
Caring for your leather car seats is essential to maintain their luxurious appearance and extend their lifespan. Leather, while durable, requires specific cleaning techniques to keep it looking its best. Regular maintenance helps prevent cracking, fading, and staining, ensuring that your seats remain comfortable and visually appealing.
In this article, we will explore effective cleaning tips and best practices for leather car seats. From selecting the right cleaning products to understanding the cleaning process, these guidelines will help you protect your investment and enhance the overall condition of your vehicle’s interior.
Whether you are dealing with minor spills or built-up grime, knowing how to properly care for leather surfaces will make a significant difference. Armed with the right information, you can ensure that your seats remain as pristine as the day you first purchased your vehicle.
Choosing the Right Cleaning Products for Leather
Selecting appropriate cleaning products for leather car seats is crucial for maintaining their appearance and longevity. Leather requires specialized care to avoid damage, such as cracking or discoloration. When choosing cleaning solutions, look for products specifically formulated for leather, as they are designed to clean without stripping essential oils.
Start with a gentle leather cleaner; avoid harsh chemicals and abrasive materials that may harm the finish. A pH-balanced cleaner is advisable, as it protects the leather’s natural integrity. Always check the label for compatibility with your specific leather type, whether it is aniline, semi-aniline, or pigmented leather.
Conditioner is another essential product to consider. Regular conditioning helps preserve the leather’s suppleness and prevents it from drying out. Choose a high-quality leather conditioner that nourishes and protects. It’s recommended to apply conditioner every few months, or more frequently if the leather is exposed to sunlight or extreme temperatures.
Test any new cleaning product on a small, inconspicuous area of the seat before a full application. This ensures that the product will not adversely affect the color or texture. By carefully selecting your cleaning products, you can enhance the durability and visual appeal of your leather car seats.
Step-by-Step Guide to Clean and Condition Leather Seats
Cleaning and conditioning leather seats can enhance their appearance and longevity. Follow these steps to ensure your leather remains in top condition.
Step 1: Gather Your Supplies
Collect a soft microfiber cloth, a leather cleaner specifically designed for automotive use, a leather conditioner, and a soft-bristled brush. Having all materials ready will streamline the cleaning process.
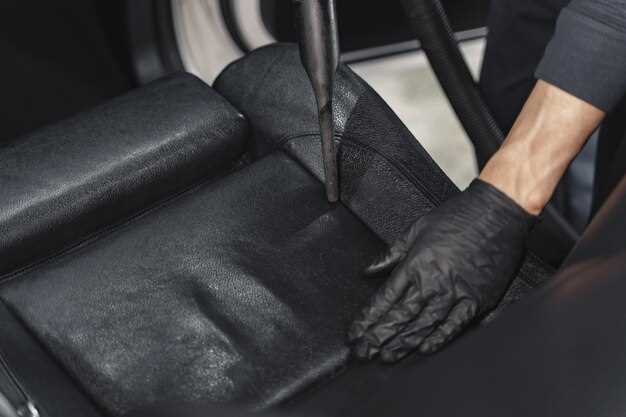
Step 2: Remove Loose Debris
Begin by vacuuming the seats to eliminate dust, dirt, and debris. Use a brush attachment to gently reach seams and crevices, ensuring no particles are left behind.
Step 3: Apply Leather Cleaner
Dampen a microfiber cloth with the leather cleaner. Avoid saturating it too much. Gently wipe down the surfaces of the leather seats, working in small sections. This method prevents the cleaner from drying out before you can wipe it away.
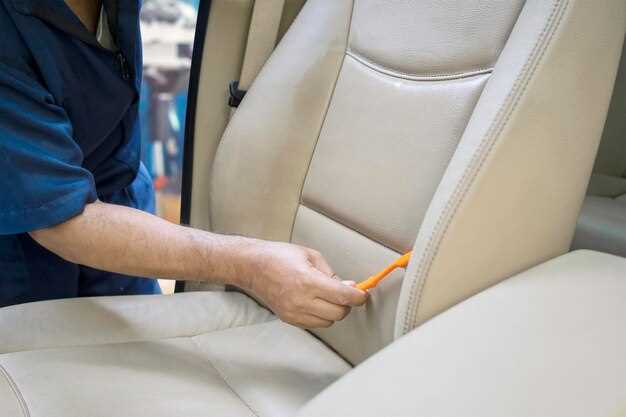
Step 4: Use a Brush for Stubborn Stains
For any tough stains, utilize a soft-bristled brush to gently agitate the area. This will help lift embedded dirt without damaging the leather. Wipe away any excess cleaner with a clean section of the microfiber cloth.
Step 5: Rinse with a Damp Cloth
Once the seats are clean, take a separate damp microfiber cloth and wipe down all surfaces to remove any cleaner residue. This step ensures that no harsh chemicals remain on the leather.
Step 6: Dry the Seats
Allow the leather seats to air dry completely. Avoid direct sunlight or heat sources, as they may cause the leather to crack or fade.
Step 7: Apply Leather Conditioner
Once the seats are dry, apply a small amount of leather conditioner to a clean microfiber cloth. Gently massage the conditioner into the leather, ensuring even coverage. This step nourishes the leather and helps maintain its flexibility.
Step 8: Buff the Seats
After allowing the conditioner to penetrate for the recommended time, use a soft, dry cloth to buff the leather seats. This final touch enhances the luster and adds a protective layer.
Step 9: Regular Maintenance
To keep your leather seats looking their best, incorporate a regular cleaning and conditioning routine. This practice helps prevent cracking and fading while preserving the overall integrity of the leather.
Preventing Damage and Maintaining Leather Quality
To ensure the longevity and appearance of your leather car seats, regular care is essential. Start by avoiding exposure to direct sunlight for prolonged periods, as UV rays can fade and dry out the leather. When parking, try to find shaded areas or use sunshades to protect the interior.
Cleaning spills immediately is crucial. Use a soft, damp cloth to dab and absorb any liquid, preventing it from penetrating the leather. In case of stains, a gentle leather cleaner specifically formulated for automotive use should be employed, followed by a conditioner to restore moisture.
Another vital aspect of maintenance involves maintaining optimal humidity levels in the car. Excessive moisture can lead to mold growth, while dry air can cause cracking. Consider using a dehumidifier in damp climates and regularly conditioning the seats to prevent both extremes.
Using protective covers can also shield against wear and tear from everyday use. Choose covers made from breathable materials designed for leather to ensure that the seats remain dry and protected without causing further damage.
Lastly, consider a regular thorough inspection of your seats for any signs of wear, such as cracks or fading. Addressing these issues promptly will help maintain the quality of your leather and prolong its life.