
Installing a cold air intake can significantly enhance your vehicle’s performance by optimizing air flow to the engine. This upgrade allows for a denser air charge, which, in turn, can improve horsepower and efficiency. Understanding the installation process is crucial for anyone looking to get the most out of their vehicle.
In this guide, we will cover the essential steps needed to install a cold air intake successfully. We will also delve into the components involved and provide tips for ensuring a smooth installation process. Whether you are a seasoned mechanic or a DIY enthusiast, our insights will help you navigate the installation with ease.
By improving the air intake system, you are not only enhancing your vehicle’s performance but also investing in its longevity. A well-functioning intake helps your engine breathe better, leading to increased throttle response and fuel efficiency. Follow our comprehensive guide to unlock the full potential of your vehicle with a new cold air intake.
Selecting the Right Cold Air Intake for Your Vehicle Model
Choosing the appropriate cold air intake for your vehicle model is crucial for maximizing performance and efficiency. Different car models have unique engine configurations, which means that one size does not fit all when it comes to air intake systems.
Start by researching the specific cold air intake options available for your vehicle make and model. Many manufacturers produce custom kits designed to fit various engine types, ensuring optimal air flow dynamics. Look for reputable brands that offer products tailored to your vehicle’s specifications.
Next, consider the design of the intake system. There are short ram kits and full cold air intakes, each offering distinct benefits. Short ram intakes typically provide quicker throttle response, while full cold air systems often deliver better overall performance by pulling in cooler air from outside the engine bay.
Additionally, check for compatibility with any existing modifications you may have made to your vehicle. Enhanced exhaust systems or performance chips can influence the kind of intake that will work best, as these upgrades may change the engine’s air flow needs.
Lastly, read customer reviews and expert recommendations. Feedback from other drivers who have installed the same cold air intake can provide insights into performance gains and installation difficulty. Ensuring that you invest in a quality product will enhance your vehicle’s performance and longevity.
Step-by-Step Instructions for Installing Your Cold Air Intake
Installing a cold air intake can enhance your vehicle’s performance by improving airflow to the engine. Follow these detailed steps to ensure a successful installation.
Step 1: Gather Your Tools and Materials
Before starting, collect all necessary tools and components. You will need a socket and ratchet set, screwdrivers, pliers, and possibly a torque wrench, along with your cold air intake kit.
Step 2: Disconnect the Battery
For safety, disconnect the negative terminal of your vehicle’s battery. This step prevents any electrical short circuits during installation.
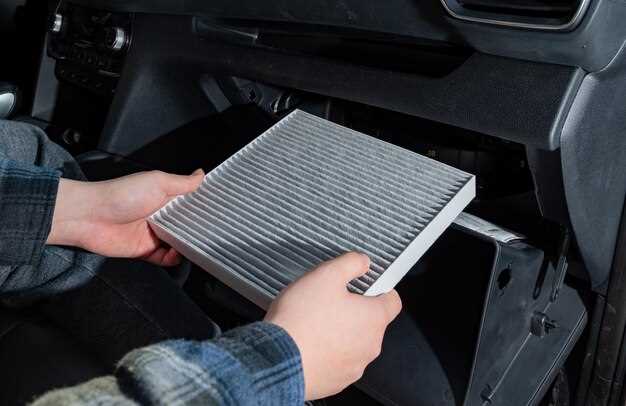
Step 3: Remove the Stock Air Intake System
Begin by locating the existing air intake system. Remove the air duct clamps and any screws securing the assembly. Carefully detach the stock intake, including the air filter and housing, ensuring no components are damaged.
Step 4: Prepare the Cold Air Intake Components
Examine the new cold air intake components. Reference the installation manual provided with your kit to identify all parts, including the intake tube, filter, and mounting hardware.
Step 5: Install the New MAF Sensor (if applicable)
If your cold air intake comes with a new Mass Air Flow (MAF) sensor, carefully transfer it from the stock intake to the new one. Follow the manufacturer’s instructions for proper positioning and alignment.
Step 6: Mount the Cold Air Intake
Attach the cold air intake tube to the throttle body, ensuring a tight seal. Use the provided clamps to secure the connections. Position the intake where it can draw in cold air while avoiding heat from the engine.
Step 7: Install the Air Filter
Attach the new air filter to the end of the intake tube. Ensure it fits securely and is positioned in a location that allows for maximum airflow.
Step 8: Recheck Connections
Go over all connections and fastenings. Ensure that everything is tightly secured, and nothing is loose. This step is crucial for optimal performance and preventing air leaks.
Step 9: Reconnect the Battery
Once everything is installed and checked, reconnect the negative battery terminal. This restores power to your vehicle’s electrical system.
Step 10: Start the Engine and Test
Start your vehicle and listen for any unusual noises, which may indicate a problem. Check for any warning lights on the dashboard. Take the vehicle for a test drive to experience the improved airflow and performance.
By following these steps, you will successfully install your cold air intake and enhance your vehicle’s efficiency and power. Regularly check the intake system for cleanliness and wear to maintain optimal performance.
Troubleshooting Common Issues After Installation

After completing the cold air intake installation, you may encounter a few common issues. Addressing these problems promptly can ensure optimal performance and longevity of your vehicle’s new system.
1. Check Engine Light Cues: If the check engine light activates post-installation, ensure that all connections are secure. Sometimes, a loose or improperly connected sensor can trigger this warning. Verify that the mass airflow sensor (MAF) is correctly connected to the intake system.
2. Rough Idling or Stalling: An improper installation could lead to air leaks, causing the engine to struggle with fuel-air mixture. Double-check all connections and seals. If issues persist, reexamine the vacuum lines for any leaks or disconnections.
3. Decreased Performance: If the vehicle feels sluggish after installing the cold air intake, confirm that the right model was chosen. Also, ensure that the air filter is clean and free from obstructions. A restricted filter can hinder airflow and impede performance.
4. Unusual Noises: Some noise is expected with a cold air intake, but any excessive or unfamiliar sounds should be addressed. Inspect the intake components to ensure they are not vibrating against other parts of the engine bay. Proper mounting is crucial to reduce unnecessary noise.
5. Reduced Fuel Efficiency: After installation, monitor fuel economy closely. If you notice a decline, it may be due to incorrect tuning or installation. Check if the engine is receiving the right amount of air and adjust the parameters as necessary. Sometimes, a professional tuning might be required.
By troubleshooting these common issues, you can enhance the effectiveness of your cold air intake and enjoy optimal performance from your vehicle.