
Maintaining your vehicle’s cooling system is crucial for its overall performance and longevity. One of the most important maintenance tasks you can undertake is flushing and refilling the coolant. Over time, coolant can break down, become contaminated, or lose its effectiveness, leading to overheating and potential engine damage.
Regularly flushing your car’s coolant not only helps to remove debris and rust that accumulate in the system but also ensures that the engine operates at the optimal temperature. This article will guide you through the proper steps to flush and refill your car’s coolant, ensuring that your vehicle remains in top condition.
From gathering the necessary tools and materials to executing each step carefully, understanding the importance of coolant maintenance is essential for every car owner. Follow these guidelines to keep your vehicle’s cooling system running efficiently and prevent future repairs.
Gather Necessary Tools and Supplies for Coolant Maintenance
Before starting the coolant flush and refill process, it is essential to gather all the necessary tools and supplies to ensure a smooth and efficient operation. First and foremost, you will need a suitable coolant for your vehicle, which can be found in various formulations depending on the make and model. Make sure to select a coolant that meets the specifications outlined in your owner’s manual.
Next, procure a funnel to facilitate the pouring of coolant without spilling. This is particularly important to avoid any potential mess or contamination. You will also need a coolant drain pan to catch the old coolant during the flushing process, as it can be harmful to the environment.
A set of ratchet and socket wrenches may be required to access the radiator drain plug or remove any components obstructing the coolant system. Also, having a pair of pliers on hand can be useful for disconnecting hoses.
Safety gear is vital as well. Equip yourself with gloves and safety goggles to protect your skin and eyes from potentially hazardous fluids. You may also want to have shop towels or rags available for cleaning up any spills that may occur during the maintenance.
Lastly, consider having a pressure tester for the cooling system if you suspect leaks or issues. This tool will help diagnose any potential problems before proceeding with the flush and refill process.
Step-by-Step Process to Flush the Cooling System
Begin by gathering the necessary tools and materials: a radiator flush, a container to catch old coolant, a funnel, and a new coolant suitable for your vehicle.
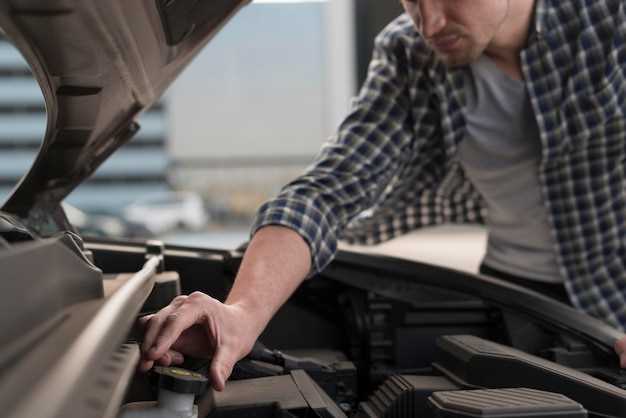
Park the vehicle on a level surface and allow the engine to cool completely to avoid injury. Open the hood and locate the radiator cap. In some cases, it may be necessary to remove the engine cover to gain access.
Start the flushing process by placing the container beneath the radiator drain valve. Open the drain valve to release the old coolant into the container. Ensure that all coolant is drained before proceeding.
Once the old coolant has been removed, close the drain valve securely. Next, prepare the radiator flush solution according to the manufacturer’s instructions and fill the coolant system with it using a funnel. This solution will help break down any deposits or contaminants in the system.
After adding the flush solution, start the engine and allow it to run for about 10-15 minutes. Keep the heater on to ensure that the flush circulates through the entire system. Monitor the temperature gauge to prevent overheating.
After running the engine for the specified time, turn it off and allow it to cool down again. Once cooled, reopen the drain valve and allow the flushing solution to drain completely.
Rinse the cooling system by filling it with clean water and letting the engine run again for about 10 minutes. This step will remove any leftover flushing solution. Drain the water once again from the radiator.
Finally, refill the system with the new coolant, using the funnel for precision. Make sure to use the appropriate type and mixture ratio as recommended in your vehicle’s manual. Close the radiator cap tightly after filling.
Start the engine one last time and check for leaks. Monitor the coolant level over the next few days to ensure your system is functioning correctly.
How to Properly Refill and Bleed the Coolant System
Refilling and bleeding the coolant system is an essential task to ensure your vehicle operates efficiently. Follow these steps to perform this process correctly.
-
Prepare the Vehicle
- Park the car on a level surface and turn off the engine.
- Allow the engine to cool completely before beginning.
- Open the hood and locate the radiator and coolant reservoir.
-
Check Coolant Level
- Inspect the coolant reservoir to determine the current level of coolant.
- If the level is low, it’s necessary to add coolant.
-
Add Coolant to the Radiator
- Remove the radiator cap carefully, using a rag to protect your hands.
- Pour the appropriate coolant mixture into the radiator until it reaches the filler neck.
-
Bleed the Coolant System
- Start the engine with the radiator cap off and let it idle.
- Observe for bubbles in the radiator; this indicates trapped air.
- Monitor the temperature gauge and ensure the engine does not overheat.
- As bubbles appear, add more coolant to maintain the proper level.
- After all air has been purged, replace the radiator cap securely.
-
Check for Leaks
- Inspect around the radiator and hoses for any signs of leaks after refilling.
- If leaks are detected, address them immediately.
-
Final Checks
- Continue monitoring the coolant level for the next few days of driving.
- Ensure that the engine remains at the correct operating temperature.
Following these steps will help maintain your vehicle’s cooling efficiency, preventing potential overheating issues in the future.