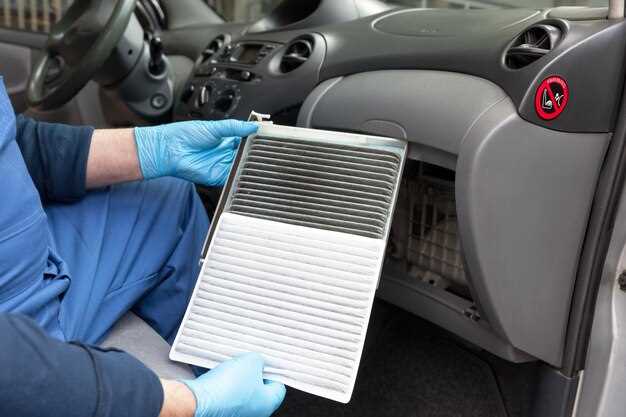
Maintaining optimal performance of your car requires regular attention to various components, one of the most important being the air filter. The air filter plays a crucial role in ensuring that the engine receives clean air, which is essential for efficient combustion and overall vehicle functionality. A clogged or dirty air filter can lead to reduced fuel efficiency, increased emissions, and even engine damage over time.
In this guide, we will explore the process of checking and replacing air filters in your vehicle. Understanding how to assess the condition of your air filter is vital. Regular inspections can help you determine whether it’s time for a replacement, ultimately saving you money on gas and preventing costly repairs down the line. Knowledge about this simple maintenance task can make a significant difference in your driving experience.
By following our comprehensive steps, you will be equipped to handle this task with confidence, ensuring that your car remains in peak condition. From identifying the right air filter for your specific make and model to knowing when to replace it, we will cover all aspects necessary for proper air filter maintenance. Let’s dive into the details and ensure that your engine breathes easy.
Identifying the Right Air Filter for Your Vehicle Model

Choosing the correct air filter for your car is essential for optimal engine performance and longevity. To begin, refer to your vehicle owner’s manual, which typically provides specific details regarding the required filter type for your model. Each car is designed with a unique engine configuration that necessitates a compatible filter to ensure proper air intake and filtration.
Additionally, consider the manufacturer’s recommendations for service intervals. Some brands may suggest replacing filters at specific mileage markers or timeframes. Using filters that meet or exceed OEM (Original Equipment Manufacturer) specifications is crucial for maintaining warranty coverage and ensuring the effectiveness of the engine’s airflow system.
After identifying the right type from your manual, check with local automotive parts stores or online retailers. When purchasing, confirm that the filter’s part number matches that listed for your vehicle. If in doubt, consulting with a mechanic or service professional can help ensure the right choice.
Finally, take note of any additional features that may enhance filtering efficiency, such as dust and pollen filters or high-flow options suited for performance vehicles. Careful selection of the filter type based on your specific car model can improve your vehicle’s overall performance and efficiency.
Step-by-Step Process for Inspecting Your Car’s Air Filter
Inspecting your car’s air filter is an essential part of routine vehicle maintenance that ensures optimal engine performance and fuel efficiency. Follow these steps for a thorough inspection.
1. Gather Necessary Tools: Before you begin, gather the required tools such as a screwdriver, flashlight, and, if necessary, a vacuum cleaner for cleaning debris.
2. Locate the Air Filter Housing: Open the hood of your car and identify the air filter housing. This is typically a rectangular or cylindrical component near the engine, connected by hoses.
3. Remove the Air Filter Cover: Use a screwdriver to remove the screws or clamps securing the air filter cover. Place them in a safe location to avoid losing them.
4. Take Out the Air Filter: Carefully pull the air filter out of its housing. Be mindful not to drop any dirt or debris into the engine compartment.
5. Inspect the Filter: Examine the filter closely for dirt, debris, and any signs of wear or damage. A clean filter will be light in color, while a dirty one will appear dark and clogged.
6. Check for Proper Fit: Ensure that the air filter fits snugly in its housing. A loose or improperly fitted filter can allow unfiltered air to enter the engine.
7. Clean or Replace: If the filter is dirty but intact, you may clean it by tapping it gently or using a vacuum. If it’s excessively dirty, torn, or damaged, replace it with a new one.
8. Reassemble: Place the clean or new air filter back into its housing. Secure the cover with the screws or clamps that you removed earlier.
9. Final Check: Ensure all tools are removed from the engine bay and double-check that everything is securely fastened before closing the hood.
Regular inspection of your car’s air filter can significantly enhance engine performance, making it a simple yet crucial aspect of auto service.
When and How to Replace Your Car’s Air Filter

Replacing your car’s air filter is essential for maintaining optimal engine performance and fuel efficiency. Generally, it should be checked every 12,000 to 15,000 miles, but some vehicles may require more frequent service depending on driving conditions and environment.
To determine when a replacement is necessary, you can inspect the air filter visually. If it appears dirty, clogged, or discolored, it’s time for a change. Pay attention to how your car performs as well; a decrease in acceleration or increase in engine noise can indicate a dirty filter.
To replace the air filter, start by locating the air filter housing, typically found near the engine. Open the housing by unclipping or unscrewing it, and carefully remove the old filter. Clean any debris from the housing to prevent contamination. Then, insert the new filter, ensuring it fits securely, and reassemble the housing. Always refer to your vehicle’s owner manual for specific instructions related to your model.
Regularly replacing the air filter not only prolongs the life of your car but also enhances its efficiency, making it a simple yet crucial aspect of automotive maintenance.