
Changing spark plugs is an essential part of vehicle maintenance that can enhance performance and fuel efficiency. Many car owners might hesitate to tackle this task due to the perceived complexity, but with the right DIY tips, it can be a straightforward process. Understanding the importance of spark plugs, which ignite the air-fuel mixture in your engine, is crucial for ensuring optimal operation.
In this guide, we will provide easy-to-follow instructions and helpful hints for changing spark plugs efficiently. Whether you are a seasoned DIY enthusiast or a beginner, these tips will empower you to perform the task with confidence. We will cover the necessary tools, step-by-step procedures, and common pitfalls to avoid, ensuring a smooth experience while working on your vehicle.
By the end of this article, you will be equipped with the knowledge to successfully change your spark plugs and maintain your car’s health. Save time and money by taking on this simple yet vital DIY project that will keep your engine running smoothly for miles to come.
Choosing the Right Spark Plugs for Your Vehicle
Selecting the appropriate spark plugs for your vehicle is crucial for optimal engine performance. The right plugs enhance fuel efficiency, improve starting, and ensure smooth engine operation.
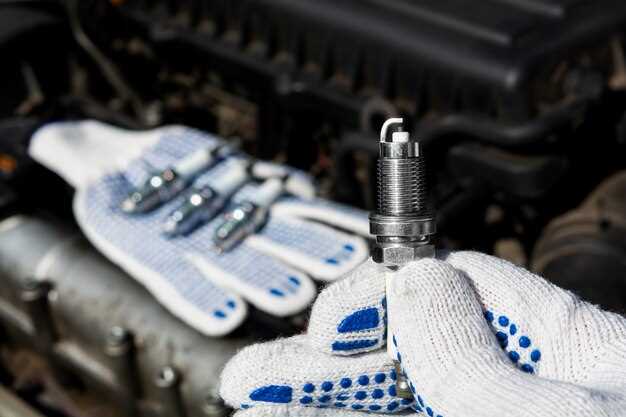
Firstly, consult your vehicle’s owner manual, which typically contains the manufacturer’s specifications, including the recommended spark plug type, heat range, and gap size. This information is essential for a successful diy spark plug replacement.
Next, consider the material of the spark plugs. Options include copper, platinum, and iridium. Copper plugs offer excellent conductivity but have a shorter lifespan. Platinum plugs provide better durability, while iridium plugs combine longevity with superior performance at higher temperatures.
Also, pay attention to the heat rating of the spark plugs. A proper heat rating ensures that the plugs operate effectively without overheating, which can lead to engine misfires or damage. Choose plugs that match your engine’s requirements to avoid potential issues.
Lastly, verify the thread size and reach of the spark plugs to ensure a proper fit within the cylinder head. This step is particularly significant for diy enthusiasts, as incorrect sizing can result in leaks or engine damage.
By considering these factors, you’ll be well-equipped to choose the right spark plugs for your vehicle, making your diy maintenance tasks more straightforward and effective.
Step-by-Step Guide to Removing Old Spark Plugs
Before starting the process, gather the necessary tools: a socket wrench, a spark plug socket, a ratchet, and a torque wrench. Having these tools on hand will ensure an efficient DIY experience.
First, ensure the engine is cool to the touch. Working on a hot engine can cause burns and damage to components. Disconnect the battery to prevent any electrical issues while you work.
Next, locate the spark plugs in your engine. Typically, they are situated near the top of the engine block, connected by ignition wires. Carefully remove these wires by pulling them straight off the plugs. Avoid twisting the wires to prevent damage.
Once the wires are removed, use the spark plug socket to fit over the spark plug. Turn the socket counterclockwise with the ratchet until the spark plug loosens. Make sure to apply steady pressure to avoid stripping the plug.
After the spark plug is loosened, continue to unscrew it by hand. Be cautious as you remove it; debris may fall into the cylinder. If this happens, use a shop vacuum to clean it out carefully before proceeding.
Inspect the removed spark plug for signs of wear or damage. This can provide insights into the engine’s condition and help diagnose potential issues. Repeat the same process for all spark plugs in the engine.
Finally, store the old spark plugs in a safe place or dispose of them properly. Ensure the area is clean and free from any tools or debris before reconnecting the battery. Your DIY task of removing old spark plugs is now complete!
Installing New Spark Plugs Without Common Mistakes

Replacing spark plugs is a straightforward DIY task that can enhance your vehicle’s performance. However, certain mistakes can lead to issues down the line. Ensuring you have the correct tools, like a spark plug socket and torque wrench, is essential to avoid damage during installation.
Before installation, always verify that you have the right type of spark plugs for your engine. Consult your owner’s manual or refer to manufacturer specifications. Attempting to use the wrong plugs can cause misfires and reduce efficiency.
When removing old spark plugs, be cautious of debris falling into the combustion chamber. To prevent this, use compressed air to clean the area before unscrewing the plugs. Additionally, check the orientation of old plugs and ensure that new ones are installed at the same angle to avoid cross-threading.
Applying the correct torque is crucial during installation. Over-tightening can damage both the spark plug and the cylinder head, while under-tightening can lead to loose plugs that may cause engine issues. Follow the specifications provided for the torque settings specific to your vehicle.
Finally, double-check all connections and ensure that the ignition wires are properly attached. Failing to do so could lead to misfires or starting problems. With attention to these details, installing new spark plugs can be a simple and effective DIY project that significantly benefits your engine’s performance.