
Vinyl wrapping has become a popular alternative to traditional paint jobs, offering a unique way to personalize your car while protecting its original finish. This method involves applying a durable vinyl layer over your vehicle’s surface, allowing for a wide range of colors, textures, and patterns that can be easily changed or removed. In this guide, we will take you through the entire process of wrapping your car, ensuring that even beginners can achieve professional-looking results.
Before diving into the step-by-step instructions, it’s essential to understand the benefits of using vinyl for your car. Unlike paint, vinyl wraps not only provide a protective barrier against UV rays and environmental damage but also allow for easy maintenance and repair. Once you’ve decided to embark on this project, gathering the right materials and tools will be crucial for achieving a smooth application.
This comprehensive guide will walk you through everything from surface preparation and material selection to the actual application of the vinyl. We will discuss common mistakes to avoid, tips for achieving a seamless finish, and how to care for your wrapped car to ensure it looks great for years to come. With patience and practice, wrapping your car with vinyl can be a rewarding experience that transforms your vehicle’s appearance.
Choosing the Right Vinyl Material for Your Car Wrap
Selecting the appropriate vinyl material is crucial for achieving a successful car wrap. The best options typically fall under either cast or calendered vinyl. Cast vinyl is ideal for complex curves and high-quality finishes, offering excellent durability and longevity. It is more expensive but provides a superior look and performance.
Calendered vinyl, on the other hand, is generally more affordable and suitable for flat surfaces or simple curves. While it may not last as long as cast vinyl, it can still deliver satisfactory results for shorter-term projects.
Another important factor is the vinyl thickness. Thicker materials tend to be more durable and easier to work with, especially during installation. A common thickness for car wraps is between 2 to 4 mils.
Additionally, consider the finish of the vinyl. Options include gloss, matte, satin, and metallic. Each finish can drastically change the car’s appearance, so choose one that aligns with your vision and the car’s aesthetic.
Lastly, pay attention to the adhesive quality of the vinyl. A high-quality adhesive ensures a secure bond, reducing the risk of peeling or bubbling. Before making a decision, research different brand reputations and user reviews to find a vinyl that guarantees both performance and appearance.
Preparing Your Car’s Surface for Vinyl Application
Before applying a vinyl wrap to your vehicle, it is crucial to ensure that the surface is properly prepared. A clean and smooth surface allows for better adhesion, enhancing the durability and appearance of the wrap.
Start by washing the car thoroughly with soap and water. This removes dirt, grime, and any existing wax or sealants that could affect the vinyl’s bond. Use a soft sponge or microfiber cloth to avoid scratching the paint. Rinse the vehicle completely to eliminate any soap residue.
After washing, inspect the surface for imperfections like scratches, dents, or rust. These issues should be addressed before the vinyl application, as they may compromise the wrap. For minor scratches, a light polishing compound can be used to smooth the surface.
Once the car is clean and the surface imperfections are resolved, dry the vehicle with a clean, dry microfiber towel. Ensure that all areas are completely dry, as moisture can prevent proper adhesion of the vinyl.
For best results, it is recommended to use an alcohol-based cleaner or solution to wipe down the surface after drying. This step removes any remaining oils, ensuring that the vinyl adheres evenly. Use a clean, lint-free cloth for this purpose.
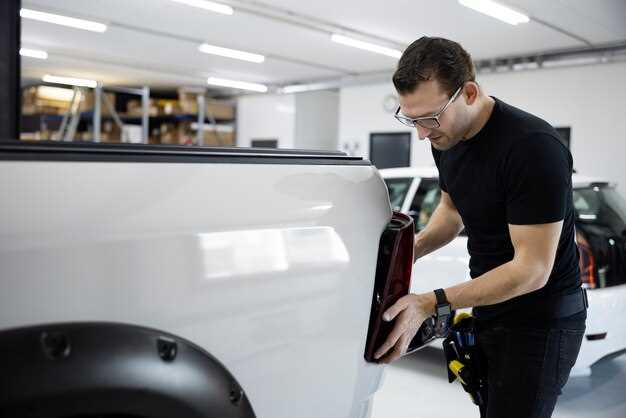
Finally, carefully mask off any areas that you do not want to wrap, such as windows, lights, or emblems. This will help to prevent accidental application of vinyl in these regions and allow for a cleaner finish.
By following these steps, you will prepare your car’s surface effectively, creating an ideal foundation for a successful vinyl wrap application.
Techniques for Applying Vinyl Without Bubbles or Wrinkles
Applying vinyl to your car can enhance its appearance and protect the paint underneath. However, achieving a smooth, bubble-free finish requires careful technique. Here are some effective methods to avoid bubbles and wrinkles during the application process.
1. Clean the Surface Thoroughly: Ensure that your car’s surface is free from dirt, dust, and oils. Use a high-quality car cleaner followed by an isopropyl alcohol wipe to prepare the area. A clean surface allows better adhesion of the vinyl.
2. Use the Right Temperature: Apply vinyl in controlled temperature conditions. Ideally, the environment should be between 60°F and 80°F (15°C and 27°C). Cold temperatures can cause the vinyl to become stiff, while excessive heat can lead to stretching and distortion.
3. Utilize a Heat Gun: A heat gun can be your best friend during vinyl application. Gently warming the vinyl as you apply it helps it to conform more easily to curves and contours. Ensure you keep the heat source at a safe distance to avoid burning the vinyl.
4. Start from One Edge: Begin applying the vinyl from one edge and gradually work your way across the surface. This helps control the flow of the material and minimizes the chances of trapping air underneath.
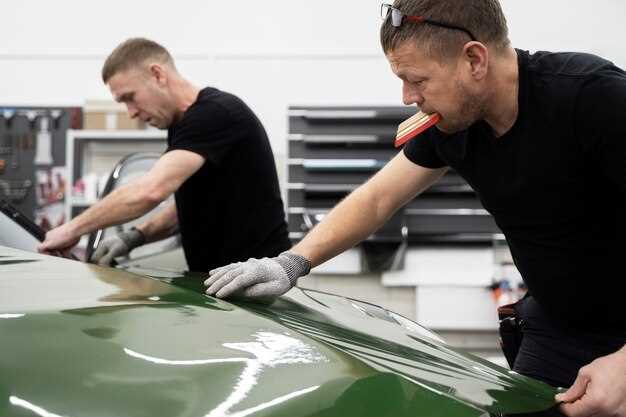
5. Use a Squeegee: A squeegee is essential for pushing out air bubbles as you apply the vinyl. Use firm, even pressure to glide over the vinyl, working from the center outward to expel any trapped air. Make sure to use a felt-covered squeegee to avoid scratching the vinyl.
6. Work in Sections: For large areas, consider applying vinyl in smaller sections rather than attempting to cover a whole panel at once. This allows for better management of the material and helps avoid wrinkles, making it easier to ensure a smooth application.
7. Patience is Key: Rushing through the application can lead to mistakes. Take your time to align the vinyl properly and ensure every part adheres correctly. If you do notice any bubbles, carefully lift the vinyl and re-squeegee the area to eliminate them.
8. Allow for Stretching: Some curved parts of the car may require stretching the vinyl. Apply heat carefully to allow the vinyl to stretch without damaging it. Make sure to follow the manufacturer’s guidelines on how much the vinyl can be stretched without compromising its integrity.
By following these techniques, you can achieve a flawless vinyl application on your car, ensuring a professional look without unsightly bubbles or wrinkles.