
The suspension system of your vehicle plays a crucial role in determining the overall quality of your ride. A well-functioning suspension ensures optimal handling, stability, and comfort, allowing drivers to navigate various road conditions with ease. However, like any mechanical system, the suspension can encounter issues over time. Understanding how to identify and repair common suspension problems is essential for maintaining your vehicle’s performance and safety.
When your car’s suspension starts to fail, you may notice signs such as unusual noises, vibrations, or a bumpy ride. These symptoms can indicate a range of issues, including worn-out shock absorbers, damaged springs, or misaligned components. Recognizing these problems early can prevent further damage and ensure a more cost-effective repair process. This article provides practical guidance on safely addressing common suspension issues, empowering you with the knowledge to tackle repairs effectively.
Before diving into the repair process, it’s vital to prioritize safety. Working on your vehicle’s suspension involves specific risks that demand caution and the right tools. Whether you’re an experienced mechanic or a novice car owner, following safety protocols will help avoid accidents and injuries during repairs. By understanding the intricacies of suspension systems and adhering to proper practices, you can restore your vehicle’s ride quality with confidence.
Identifying Symptoms of Suspension Problems During a Car Ride
Experiencing a smooth and stable ride is essential for both safety and comfort while driving. However, specific symptoms can indicate underlying suspension issues that may need immediate repair. Recognizing these signs early can prevent further damage to your vehicle and ensure a safe ride.
One of the most common indicators of suspension problems is a noticeable increase in bounciness when driving over bumps or potholes. If your car feels like it is bouncing excessively, this could signify worn-out shock absorbers or struts. This effect may lead to a lack of control during the ride, making it crucial to address the situation promptly.
Another symptom to watch for is uneven tire wear. If you notice that one side of your tires is wearing more quickly than the other, it may suggest misalignment due to suspension issues. Proper alignment is crucial for a balanced ride and to ensure that tires maintain optimal contact with the road.
Additionally, listen for unusual noises during your drive. Clunking, rattling, or knocking sounds when going over bumps may point to loose or damaged suspension components. These sounds should not be ignored, as they can signal potential failure of parts that are essential for a stable ride.
Overall, being attentive to these symptoms while driving is vital for identifying suspension problems. Timely repairs can significantly enhance your driving experience and maintain your vehicle’s safety and performance.
Step-by-Step Guide to Inspecting Suspension Components

Inspecting your car’s suspension components is essential for maintaining a smooth and safe ride. Follow these steps to ensure you conduct a thorough inspection.
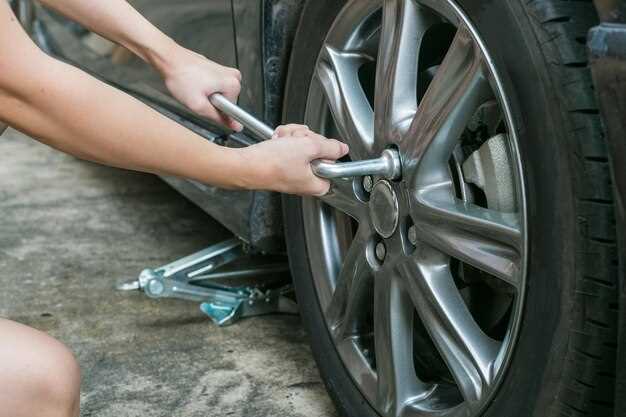
1. Preparation: Park your car on a level surface and engage the parking brake. Gather necessary tools such as a jack, jack stands, and a flashlight.
2. Visual Inspection: Start by visually examining the suspension system. Look for signs of wear, damage, or rust on components such as control arms, struts, and shock absorbers. Check for any leaking fluid from shocks or struts.
3. Lift the Vehicle: Use a jack to raise the front or rear of the car, depending on which suspension components you want to inspect. Secure the vehicle with jack stands to ensure safety while working underneath.
4. Check Bushings: Inspect the rubber bushings at the joints of the suspension components. Look for cracks, splits, or decay that could affect the car’s handling.
5. Examine Springs: Look for any broken or cracked coil springs. Ensure that the springs are seated properly and show no signs of fatigue.
6. Shock Absorbers and Struts: Compress each shock or strut by pushing down on the vehicle. They should rebound smoothly without bouncing multiple times. If they do, it’s time for a replacement.
7. Check Ball Joints: Grasp the wheel and attempt to rock it in and out. Excessive movement indicates worn ball joints, which can lead to steering and suspension issues.
8. Tie Rod Ends: Inspect the tie rod ends for any signs of wear or play. Look for torn boots, which can allow dirt and debris to enter and cause damage.
9. Final Checks: After inspecting all visible components, ensure that no hardware is loose or missing. Tighten any bolts that may need adjustment.
10. Test Drive: Once everything has been inspected and potentially repaired, take your car for a test drive. Pay attention to how the vehicle handles, listens for unusual noises, and feels during the ride.
Regular inspections of your car’s suspension components can help prolong the life of your vehicle and ensure a safe driving experience. Address any issues promptly to avoid more significant repairs later.
Best Practices for Performing Suspension Repairs at Home
When tackling suspension repairs at home, safety and precision are paramount. First, ensure you have the right tools, including jacks, jack stands, wrenches, and torque wrenches to avoid accidents. Before starting the repair, park your car on a flat surface and engage the parking brake to prevent any movement during the process.
Next, always inspect the suspension components thoroughly. Look for signs of wear such as cracks, leaks, or excessive rust. This assessment will help you determine what parts need repair or replacement, impacting your car’s overall ride quality. It’s essential to refer to your vehicle’s service manual for specific instructions and torque specifications related to your car’s suspension system.
When removing suspension parts, keep all hardware organized, as this will simplify reassembly. Take notes or photos during the disassembly process to ensure you can reassemble everything correctly. Additionally, replace any worn-out bushings or components to maintain optimum performance and ensure a smoother ride after the repair.
During the reassembly stage, take care to align the components correctly and adhere to torque specifications to avoid future issues. After completing the suspension repair, it’s advisable to check the wheel alignment. A misaligned suspension can lead to uneven tire wear and can negatively impact your vehicle’s ride quality.
Finally, after reassembling and aligning the suspension, take a test drive at low speeds to listen for any unusual noises and evaluate the car’s handling. This step will help you confirm that your suspension repair was successful before driving at higher speeds. Always remember: if you’re ever uncertain about the repair process or the integrity of your suspension system, consulting a professional mechanic is a prudent choice.