
Replacing brake pads is an essential maintenance task that every vehicle owner should be aware of. This DIY project not only saves you money on labor costs but also enhances your understanding of how your vehicle operates. With the right tools and a little bit of patience, you can replace your brake pads efficiently and effectively.
Brake pads play a vital role in your vehicle’s braking system. They create the necessary friction to slow down or stop your car safely. Over time, brake pads wear down, leading to reduced braking performance and possible damage to other components. Being proactive about replacing them ensures your safety on the road.
This guide will walk you through the complete process of replacing brake pads step by step. Whether you’re a seasoned DIY enthusiast or a beginner, the clear instructions and practical tips provided will empower you to tackle this important maintenance task confidently. Get ready to learn how to keep your brakes in optimal condition!
Choosing the Right Brake Pads for Your Vehicle
When it comes to vehicle maintenance, choosing the right brake pads is crucial for safety and performance. The selection process requires an understanding of your specific vehicle requirements and driving habits. Brake pads come in various materials, including organic, semi-metallic, and ceramic, each offering distinct advantages and disadvantages.
Organic brake pads are quieter and produce less dust, making them ideal for daily driving in light vehicles. However, they may wear out faster under heavy use. Semi-metallic pads provide better performance and heat dissipation, making them suitable for high-performance applications or heavier vehicles. On the other hand, ceramic brake pads combine durability with quieter operation, offering a balance for various driving styles.
It’s essential to consult your vehicle’s manual or a trusted automotive expert to match the brake pads with your car’s specifications. Consider your driving conditions, such as city driving versus highway driving, as this may affect your choice. For instance, if you frequently encounter stop-and-go traffic, pads that offer better heat management might be more appropriate.
In addition to material selection, pay attention to the brake pad thickness and brand reputation. Investing in high-quality pads can prevent more extensive repairs down the line, ensuring your brakes perform optimally. DIY enthusiasts often find brake pad replacement manageable, but be sure to use appropriate tools and follow verified guides to ensure the repair is done correctly.
Ultimately, selecting the right brake pads will enhance your vehicle’s stopping power, longevity, and overall driving experience. Make informed choices based on reliable information to ensure optimal safety on the road.
Step-by-Step Process for Removing Old Brake Pads
Replacing brake pads can be a fulfilling DIY repair project. Follow these detailed steps to ensure a successful removal of old brake pads.
-
Gather the necessary tools and materials:
- Jack and jack stands
- Wheel chocks
- Socket wrench
- Brake pad spreader or C-clamp
- New brake pads
- Brake cleaner
- Gloves and safety glasses
-
Secure your vehicle:
- Parks the car on a level surface.
- Engage the parking brake.
- Place wheel chocks behind the rear wheels.
-
Lift the vehicle:
- Using a jack, lift the front or rear end of the vehicle, depending on which brake pads you are replacing.
- Once elevated, place jack stands under the vehicle for safety.
-
Remove the wheel:
- Use a socket wrench to loosen and remove the lug nuts.
- Carefully take off the wheel and set it aside.
-
Access the brake caliper:
- Locate the caliper, which houses the brake pads.
- Remove the caliper bolts using the socket wrench.
- Carefully lift the caliper away from the rotor, ensuring not to stress the brake line.
-
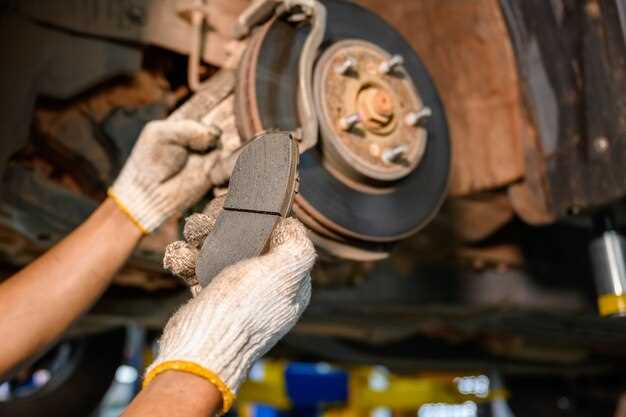
Remove the old brake pads:
- Note the orientation of the old pads to aid in installing new ones.
- Slide the old pads out of the caliper bracket.
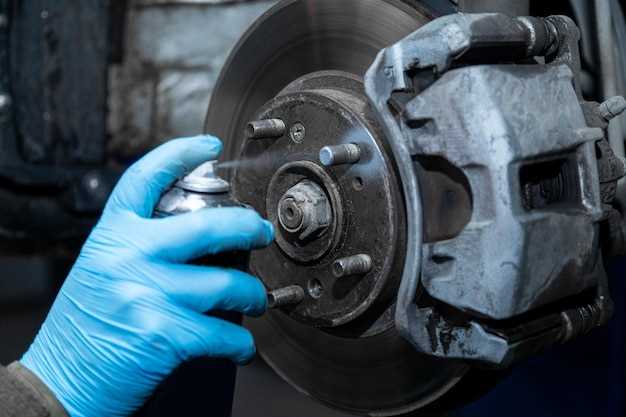
- If necessary, use a brake cleaner to remove any debris from the caliper and rotor.
-
Prepare to install new pads:
- Before installing the new pads, compress the caliper piston back into the caliper housing using a brake pad spreader or C-clamp. This creates enough space for the new pads.
Following these steps will ensure a smooth process in removing old brake pads, paving the way for installing new ones. Always remember to double-check your work before reassembling the wheel and lowering the vehicle.
Installing New Brake Pads: Tips and Best Practices
When replacing your brake pads, proper installation is crucial for safety and performance. Here are essential tips for a successful DIY brake pad installation.
First, ensure you have the right tools and parts. Gather a jack, jack stands, a lug wrench, a C-clamp, and a socket set. Confirm that the new pads are compatible with your vehicle model.
Before starting, park your vehicle on a flat surface and engage the parking brake. Loosen the lug nuts while the wheel is still on the ground to prevent it from spinning.
Once the vehicle is safely lifted and secured on jack stands, remove the wheel to access the brake caliper. Inspect the caliper for any signs of wear or damage. If needed, replace it before installing the new pads.
Next, compress the caliper piston using a C-clamp. This step is essential to create space for the new, thicker pads. Be gentle during this process to avoid damaging the piston.
Remove the old brake pads by unscrewing the caliper bracket. Take note of how the pads are positioned to ensure correct placement of the new ones. Clean the caliper and bracket with brake cleaner to remove dust and debris.
Install the new brake pads into the caliper bracket, ensuring they are oriented correctly. Reattach the caliper over the pads and tighten the bolts securely according to the specifications in your vehicle’s manual.
Before reassembling the wheel, pump the brake pedal several times to ensure proper pad alignment and re-establish brake pressure. Finally, replace the wheel, tighten the lug nuts, and lower the vehicle.
Test the brakes gently at low speeds before driving normally. This initial test will help you ensure that the installation was successful and that the pads are functioning properly.